Forms
Navigation path: Automation > Flows

Summary
Purpose
With Forms you collect customer requests (+ contact information) during off-duty times, and gather feedback after completed support interactions.
Functionalities / need to know
- Forms can be triggered after conversation is marked as done
- Forms can be triggered through Action Rules
Feature descriptions
Your first Form
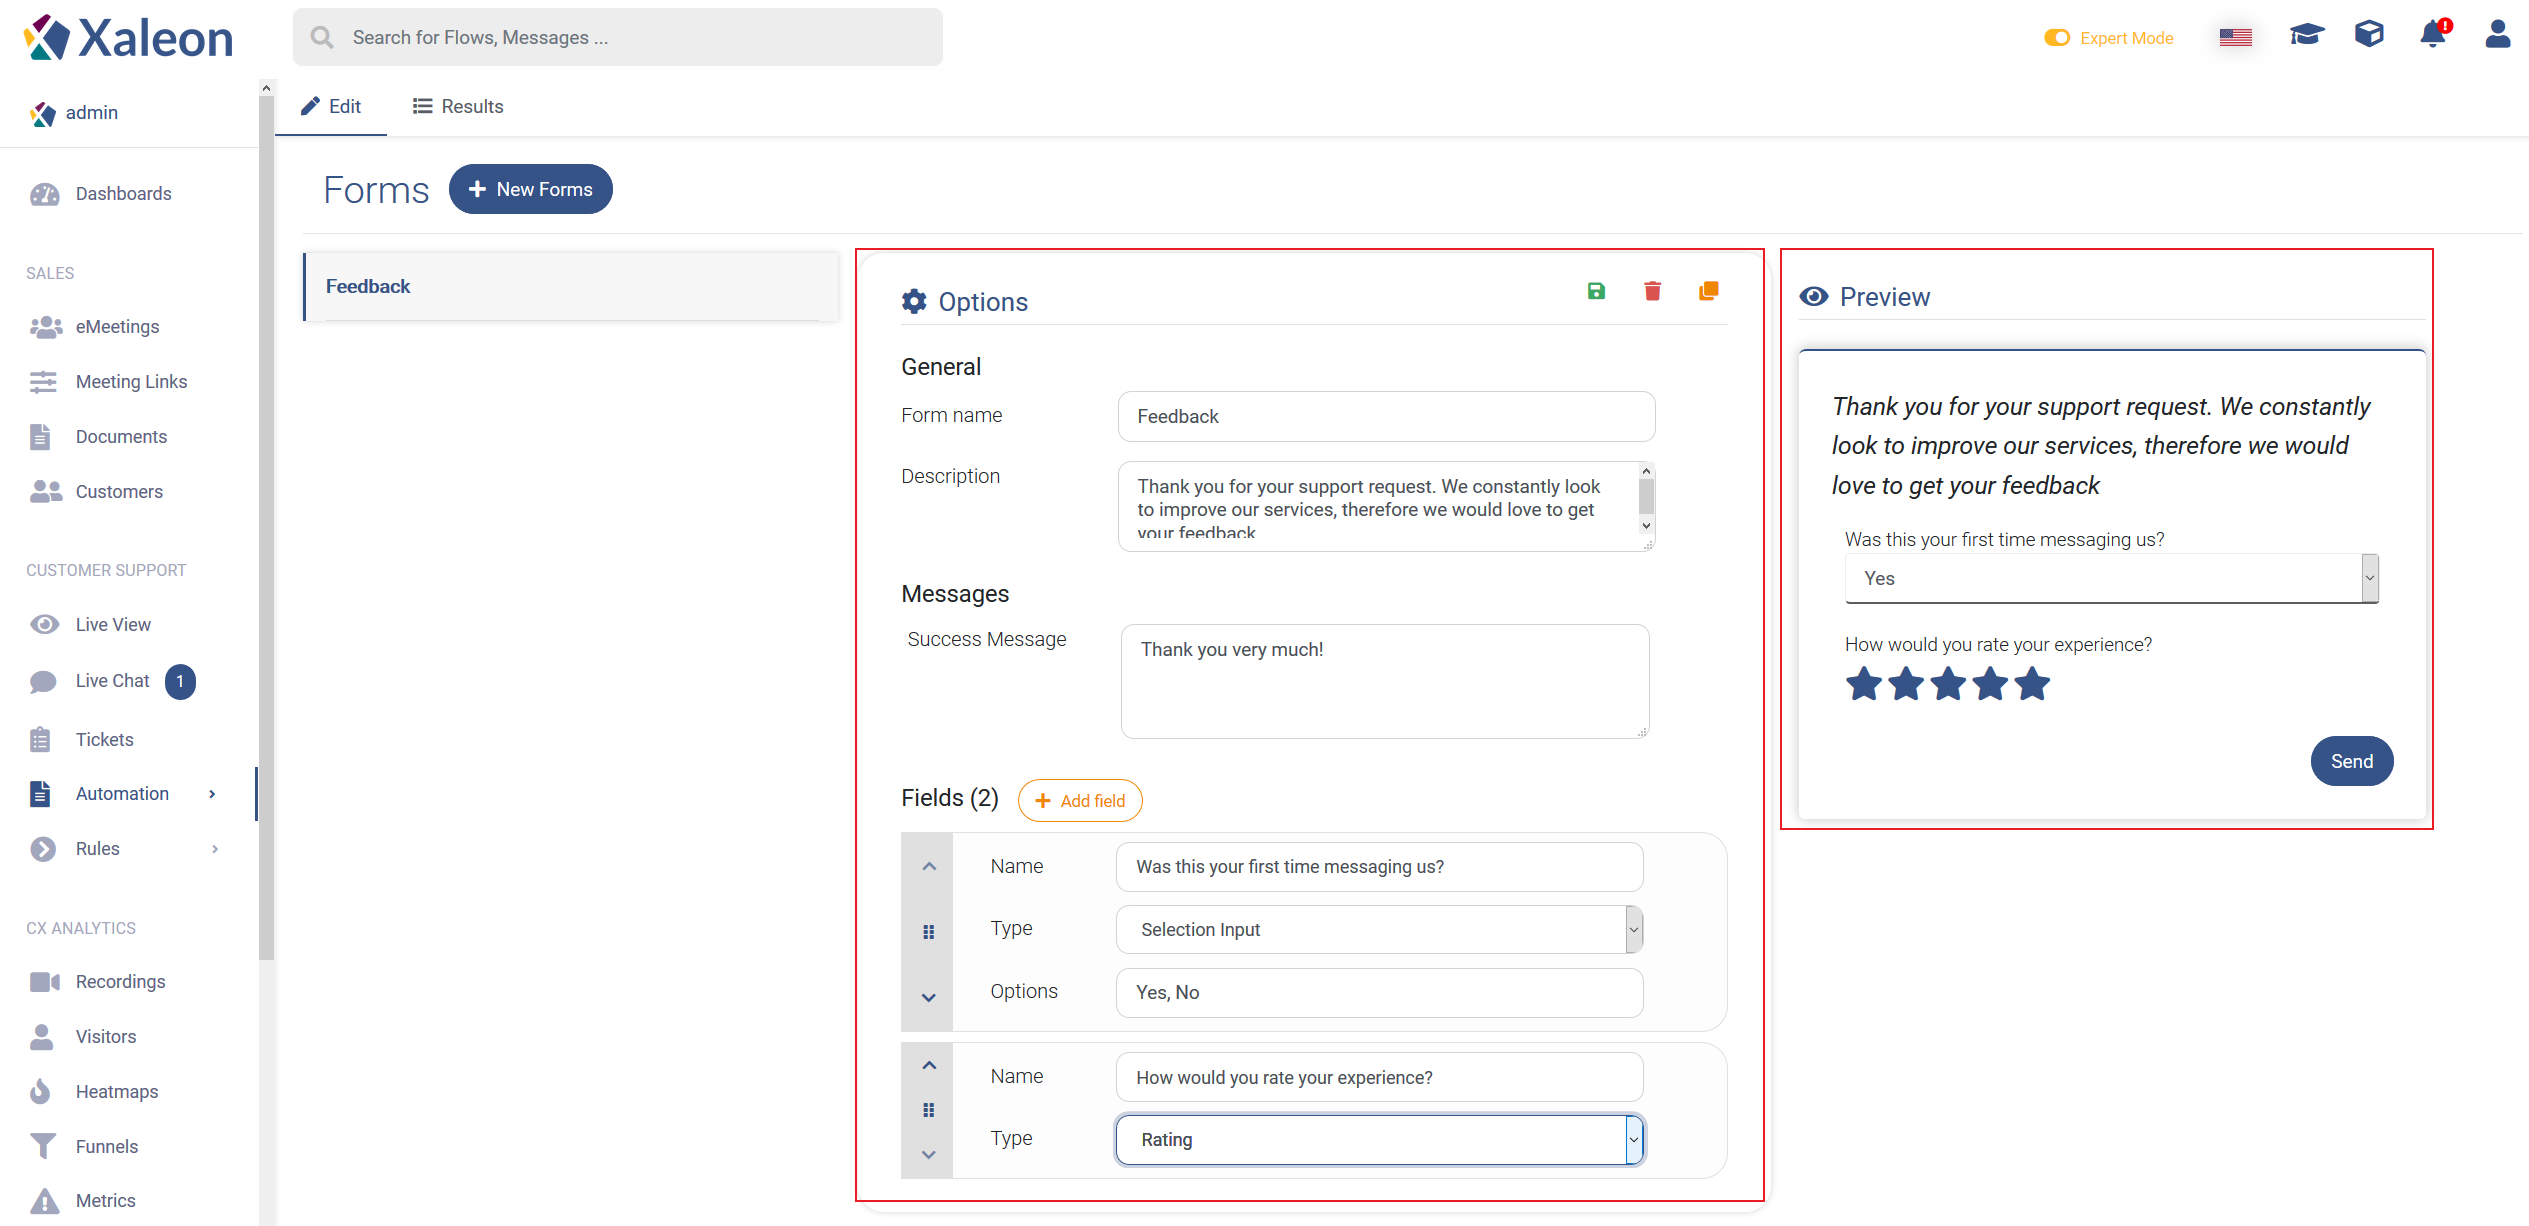
By clicking + New Forms you will create a new Form.
Options
General
| Label | Description |
|---|---|
| Form Name | name of your form, not visible to customers |
| Description | will be the header of your form, explain the customer your intention here |
Messages
| Label | Description |
|---|---|
| Success Message | message that will be sent after completion of the Form |
Fields
By clicking + Add field you create new form fields to expand your Form. Field elements can be ordered by using the options on the left.
Name
Name of your field. This is only for you and will not be visible to customers.
Type
There are different types of inputs:
| Label | Description |
|---|---|
| Text input | plain, open text input |
| Selection input | creates a drop down menu with the defined Options (separate options with ',') |
| True/False | creates a checkbox |
| Rating | creates a 5-star rating scheme |
| Textarea | creates a textarea where the customer can enter a text |
Preview
In the preview you can exactly see, what your Form will look like.
