Integration - Freshdesk
This usecase describes the steps necessary to integrate the Freshdesk ticketing system into the Chatvisor Live Chat.
Glossary
Customeris a user who writes a message through the chat.User/Agentis the user/agent who answers the chat.
Overview
Enable Freshdesk
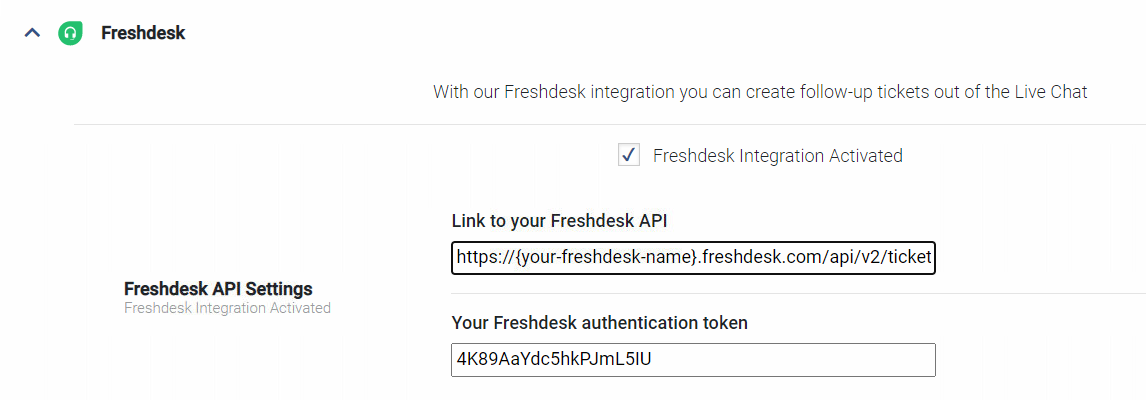
You can enable the Freshdesk integration in the Settings/General/Connections page.
There are two necessery pieces of information needed:
- Your Freshdesk API endpoint.
https://{your-freshdesk-name}.freshdesk.com/api/v2/tickets
- Your Freshdesk API access token.
e.g. something looking like this: 4K89AaYdc5hkPJmL5IU

Live Chat
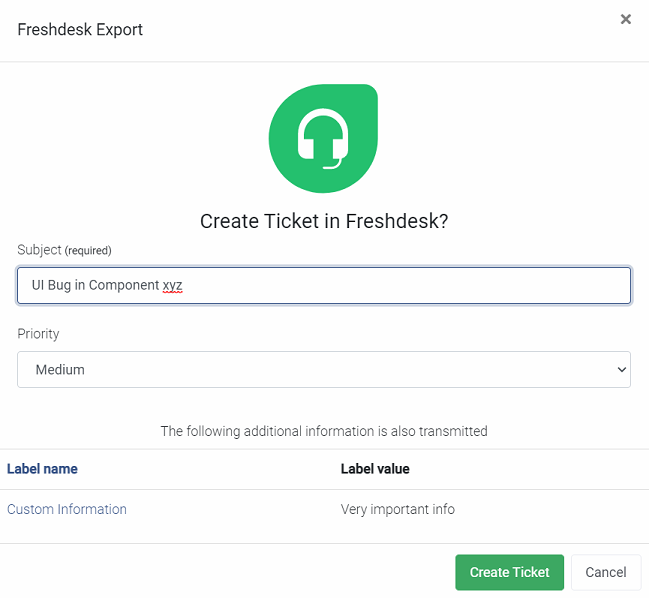
If the Freshdesk integration is enabled, a dialog window is opened automatically whenever the agent finishes a support case and sets the conversation status to Done. This allows the agent to enter ticket information like subject and priority.
Additionally the chat history is stored in the description field of the ticket.
Also included is contact information specified about the customer. At the moment this includes first and last name as well as the email address. Finally a table of defined custom fields is shown.

Custom Fields
The Freshdesk ticketing system supports the inclusion of user defined custom fields into the ticket information. In the image above such a defined custom field named "Custom Information" is shown.
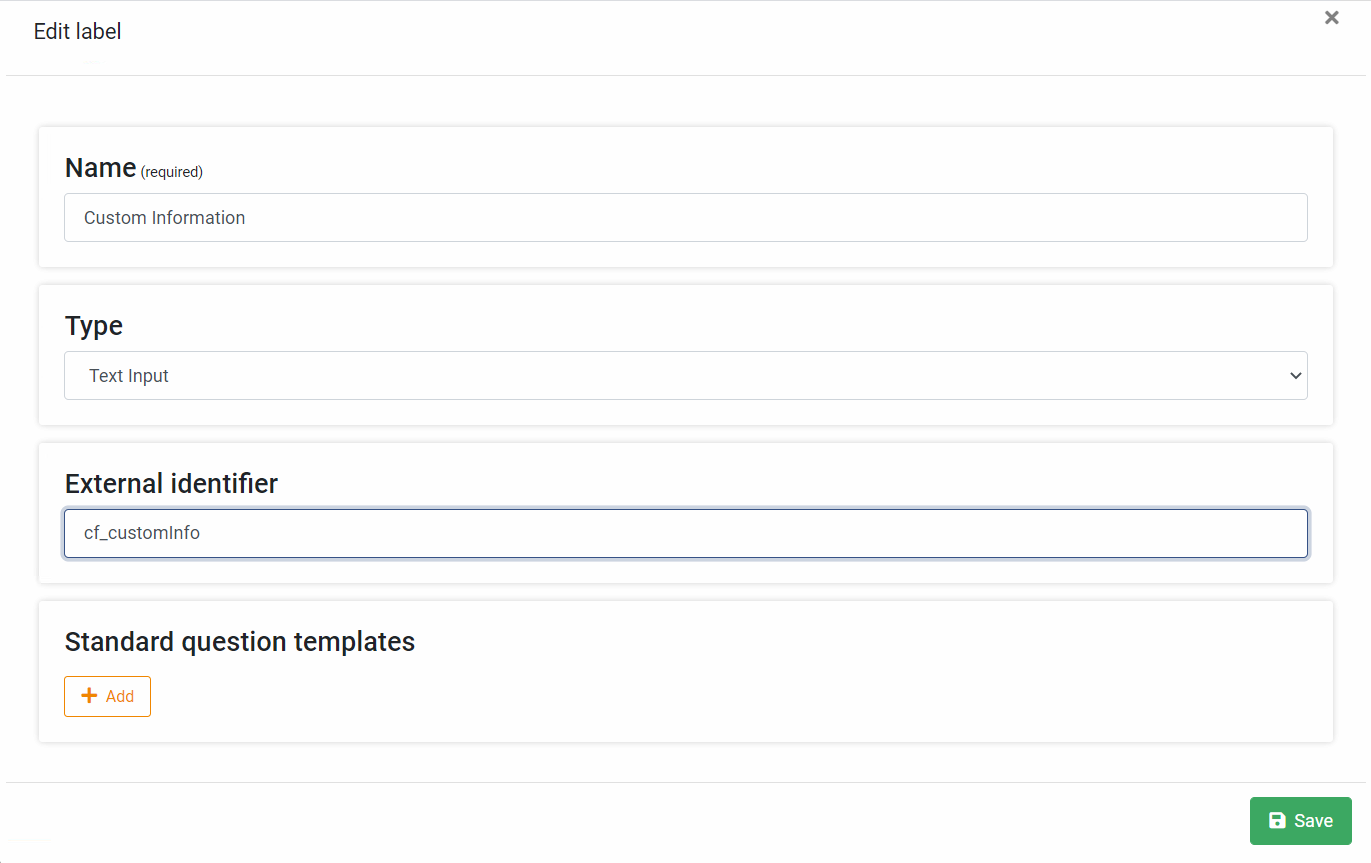
To define these custom fields, the labels from the Settings/Chat/Tagging page are used. You can add an external identifier to include the information from this field in your freshdesk tickets. The defined external id must match the name of the corresponding custom field of your freshdesk system.

Troubleshooting
Make sure that the link to your API endpoint follows the shown format exactly and that your access token is valid.
Make sure the labels defined external identifier matches the name of the corresponding custom field in your freshdesk system.
